用一个 jmeter 配合 python 生成个人信息的案例来介绍下如何在 jmeter 中使用 python,由此还可以衍生很多其他的配合用法
环境准备
- Jmeter
- 解析json用到了 json.jar 包,下载后放置到 jmeter 安装目录\lib\ext\ 内
- Python
- 此处模拟数据用到了 faker 库,需要安装(pip install faker -i https://pypi.douban.com/simple/ )
编写 Python 脚本
以下是生成个人信息的代码(creat_pelope.py),其余见注释
from faker import Faker
import datetime,json

faker=Faker(locale='zh-CN')

class GetIDCardInfo():
    def __init__(self,tcardID):
        self.tcardID = tcardID
        self.birth_year = int(self.tcardID[6:10])
        self.birth_month = int(self.tcardID[10:12])
        self.birth_day = int(self.tcardID[12:14])

    def get_birthday(self):
        # 通过身份证取出生日,日期格式化输出,处理前导零的问题。':02d'
        # birthday = "{0}-{1}-{2}".format(self.birth_year, self.birth_month, self.birth_day)
        # return birthday
        birthday = f"{self.birth_year}-{self.birth_month:02d}-{self.birth_day:02d}"
        return birthday

    def get_sex(self):
        num = int(self.tcardID[16:17])
        if num % 2 == 0:
            return '女'
        else:
            return '男'

    def get_age(self):
        now = (datetime.datetime.now() + datetime.timedelta(days=1))
        year = now.year
        month = now.month
        day = now.day

        if year == self.birth_year:
            return 0
        else:
            if self.birth_month>month or (self.birth_month ==month and self.birth_day > day):
                return year - self.birth_year - 1
            else:
                return year - self.birth_year

    def get_address(self):

        # ID_address,这部分太长,省略,代码块后提供完整文件下载
        ID_address={"110000":"北京市"}


        if self.tcardID[0:6] in ID_address.keys():
            return ID_address[self.tcardID[0:6]]
        else:
            return ''

def create_people():

    taddress = ''

    while taddress == '':
        # 生成年龄在 1 - 90 岁 的身份证好
        tcardID=faker.ssn(min_age=1, max_age=90)
        # 从身份证号中解析出地区,解析出错的身份证舍弃,循环生成一个新的身份证号
        taddress=GetIDCardInfo(tcardID).get_address()

    tbirthday = GetIDCardInfo(tcardID).get_birthday()

    tsex = GetIDCardInfo(tcardID).get_sex()

    tage = GetIDCardInfo(tcardID).get_age()

    # 生成个名字,有个.name_male() 和 .name_fename()用来生成男名、女名的,只是效果不佳
    tname = faker.name()

    # 生成个手机号码
    ttel=faker.phone_number()

    # 从身份证解析出省市区
    taddress=GetIDCardInfo(tcardID).get_address()

    # 压成字典
    pepole = {'name': tname,
        'cardId': tcardID,
        'sex': tsex,
        'birth': tbirthday,
        'age': tage,
        'address': taddress,
        'tel': ttel
        }

    # 将字典转成jason字符串
    pepole = json.dumps(pepole,ensure_ascii=False)

    # 输出,jmeter BeanShll 能接收到的部分
    print(pepole)

if __name__ == '__main__':
    create_people()
添加 前置处理器-BeanShell 预处理程序,编辑脚本

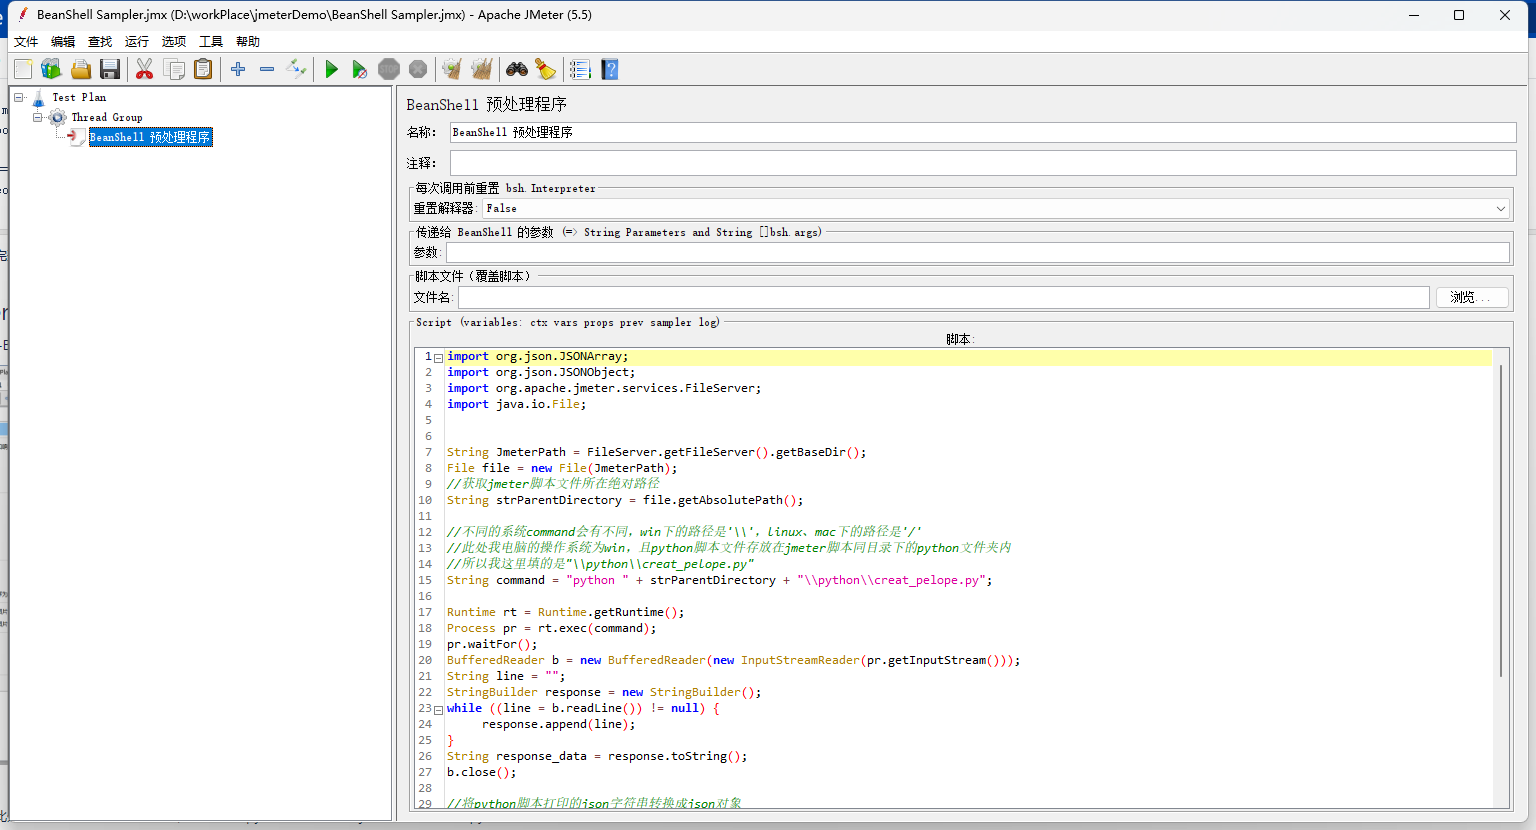
脚本内容如下:此处需要修改的地方在第17行,本例是将python文件放在了jmeter脚本目录的python文件夹下。可按自己的文件路径进行修改
本例文件目录如下:
├─python
│  └─create_people.py
└─BeanShell Sampler.jmx
BeanShell脚本
//这里需下载json.jar放到指定目录后才能引入,见开头“环境准备”
import org.json.JSONArray;
import org.json.JSONObject;

import org.apache.jmeter.services.FileServer;
import java.io.File;


String JmeterPath = FileServer.getFileServer().getBaseDir();
File file = new File(JmeterPath);
//获取jmeter脚本文件所在绝对路径
String strParentDirectory = file.getAbsolutePath();

//不同的系统command会有不同,win下的路径是'\\',linux、mac下的路径是'/'
//此处我电脑的操作系统为win,且python脚本文件存放在jmeter脚本同目录下的python文件夹内
//所以我这里填的是"\\python\\creat_pelope.py"
String command = "python " + strParentDirectory + "\\python\\creat_pelope.py";

Runtime rt = Runtime.getRuntime();
Process pr = rt.exec(command);
pr.waitFor();
BufferedReader b = new BufferedReader(new InputStreamReader(pr.getInputStream()));
String line = "";
StringBuilder response = new StringBuilder();
while ((line = b.readLine()) != null) {
    response.append(line);
}

//将python打印的内容(见python脚本 print(pepole) )赋值给 response_data
String response_data = response.toString();
b.close();

//将字符串转换成json对象
JSONObject jsonobj = new JSONObject(response_data);

//将参数保存至变量
vars.put("name",jsonobj.getString("name"));
vars.put("cardId",jsonobj.getString("cardId"));
vars.put("sex",jsonobj.getString("sex"));
vars.put("birth",jsonobj.getString("birth"));
vars.put("age",jsonobj.getString("age"));
vars.put("address",jsonobj.getString("address"));
vars.put("tel",jsonobj.getString("tel"));
查看结果
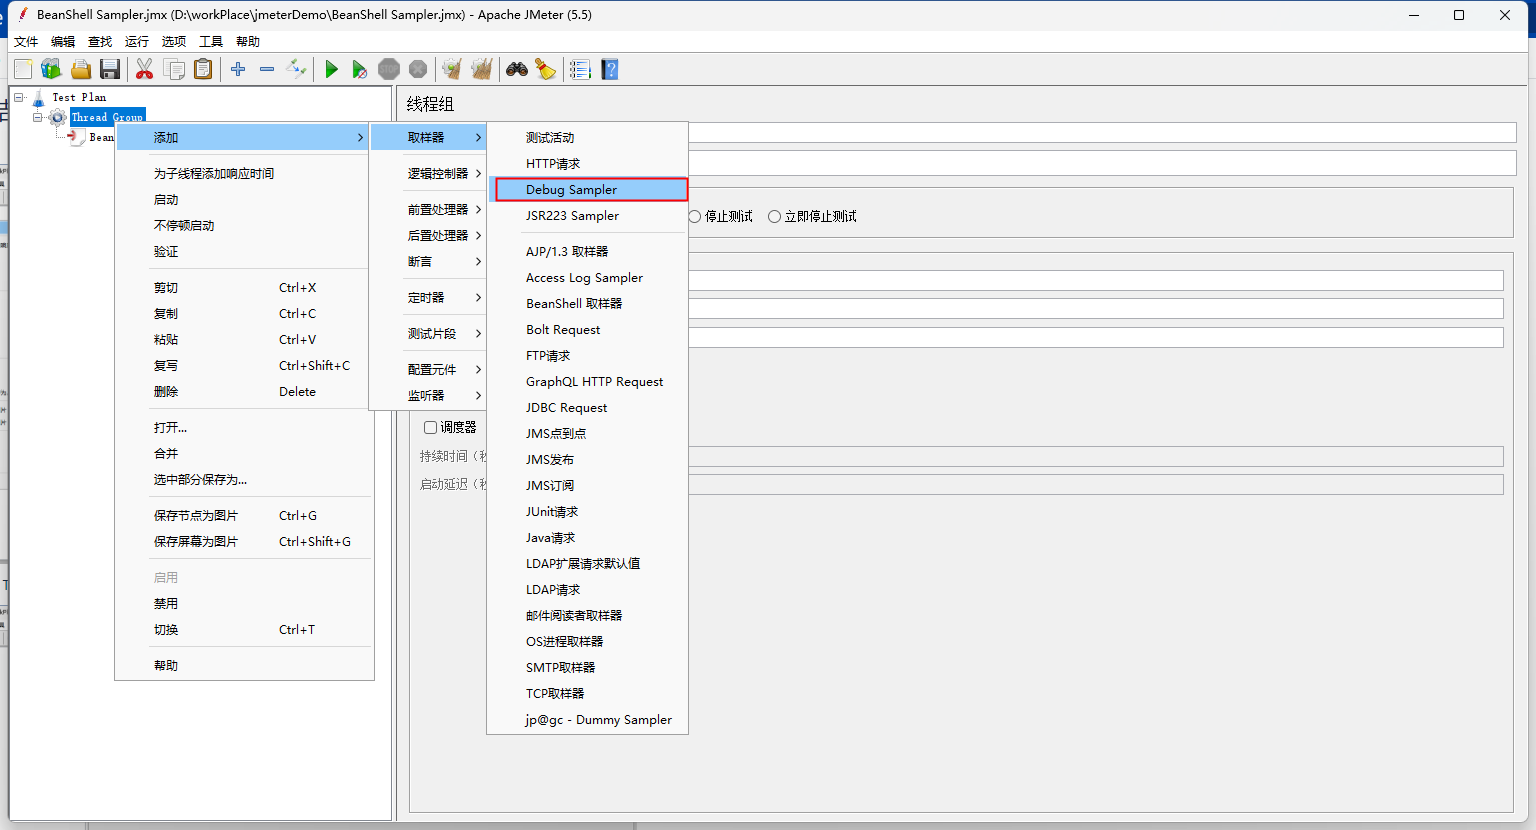
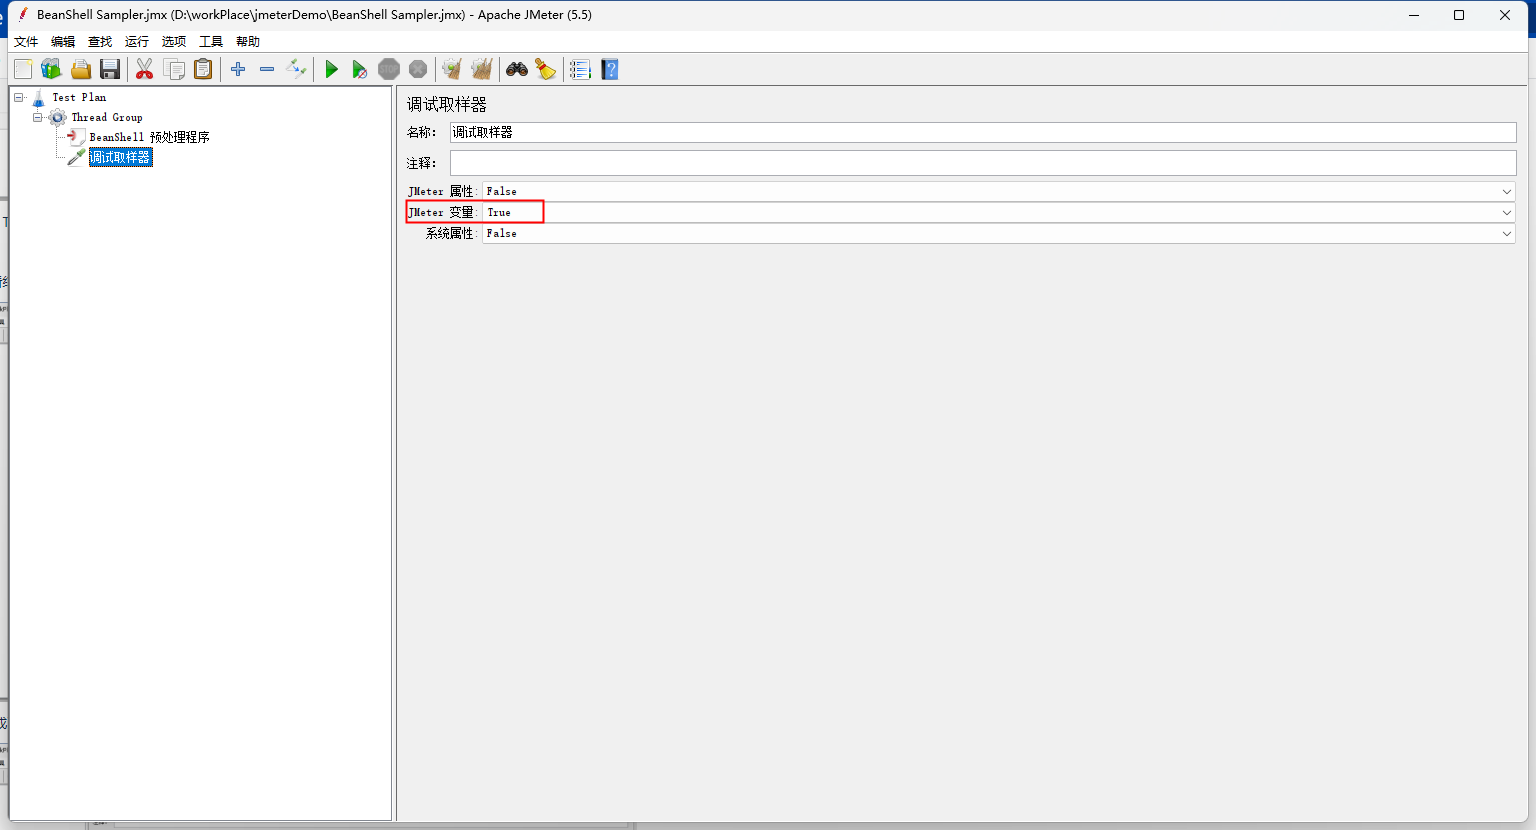
添加调试取样器:
jmeter 变量 选择 True,用以检查刚刚的变量是否正确保存
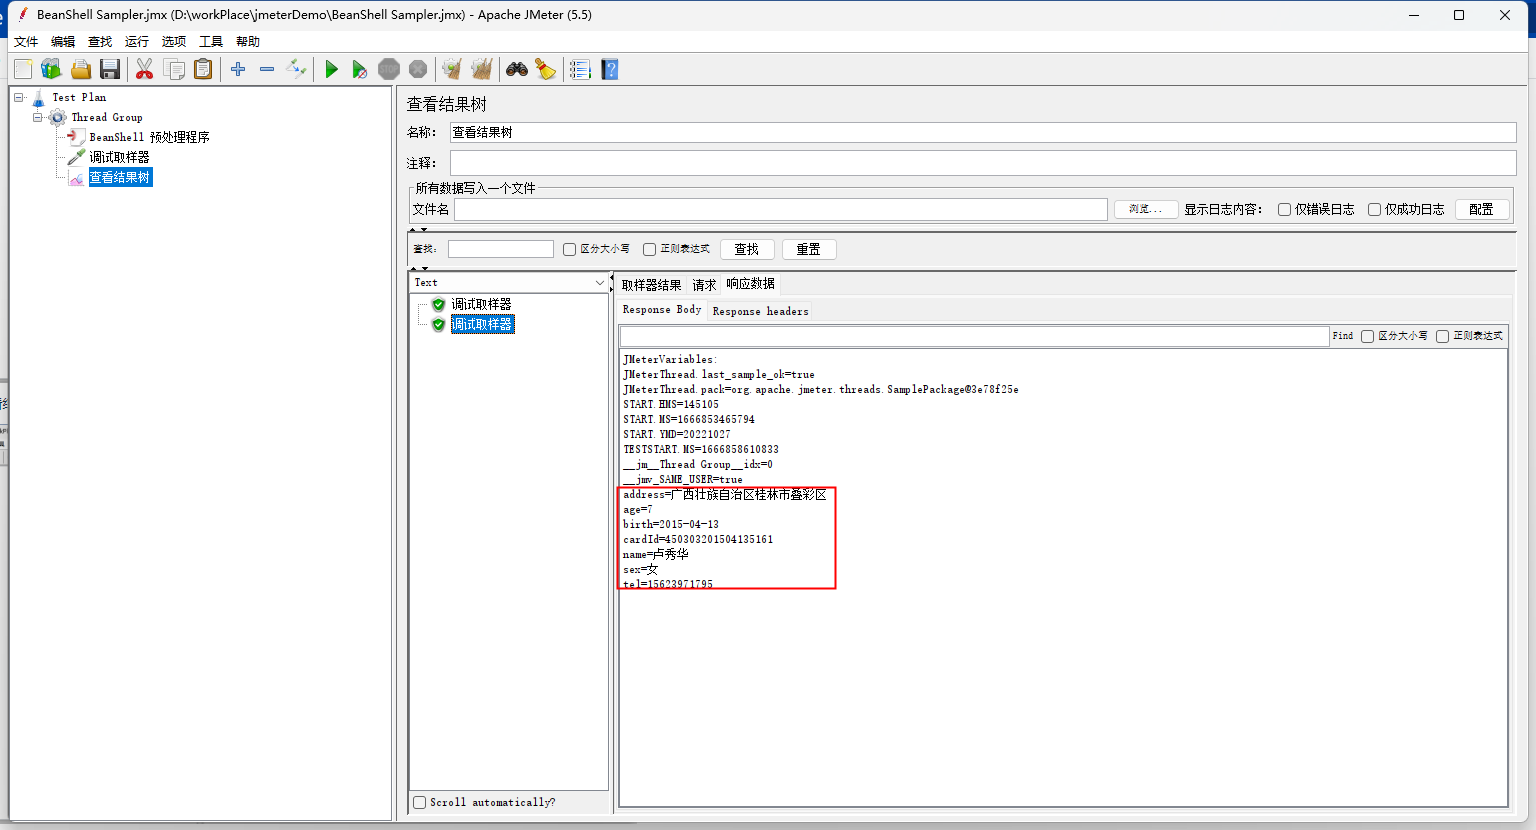
添加 监听器-查看结果树,并运行。查看响应数据,可以看到,刚刚的变量已经成功保存了
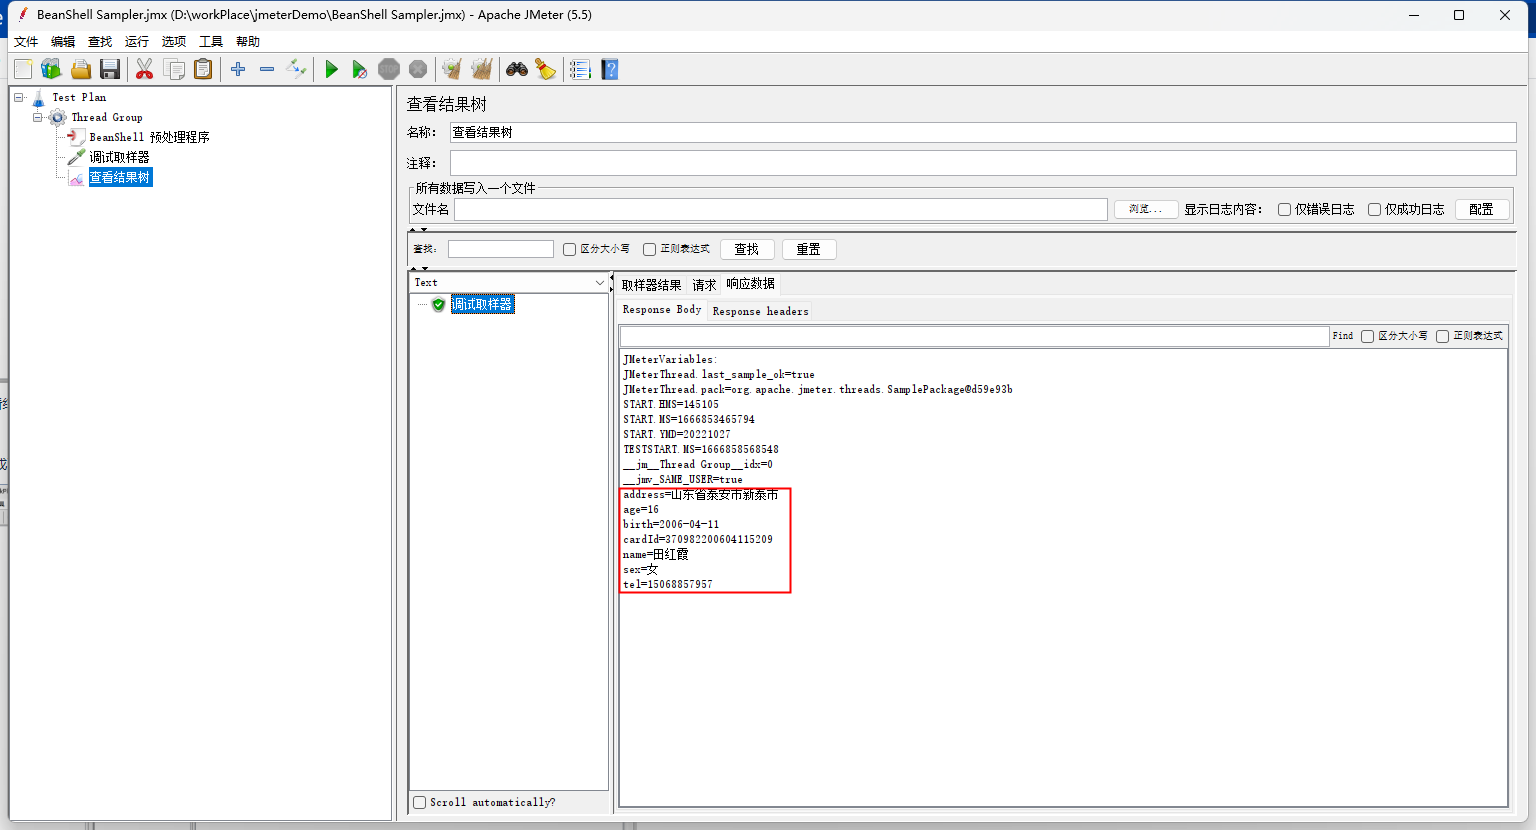
再次运行,又生成了新的个人数据,这样随机生成个人信息的取样器就完成了